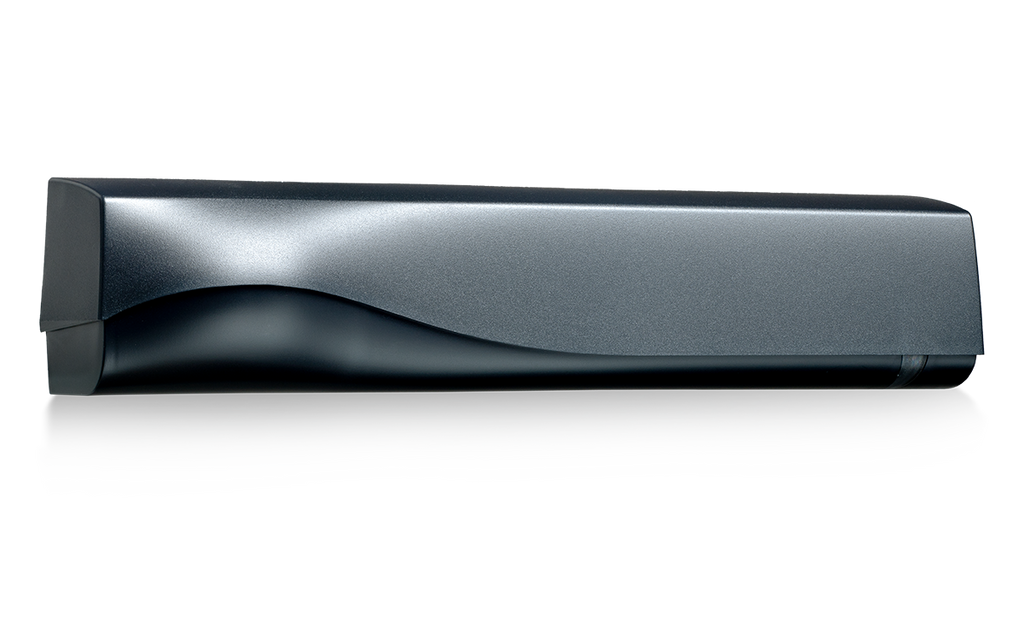
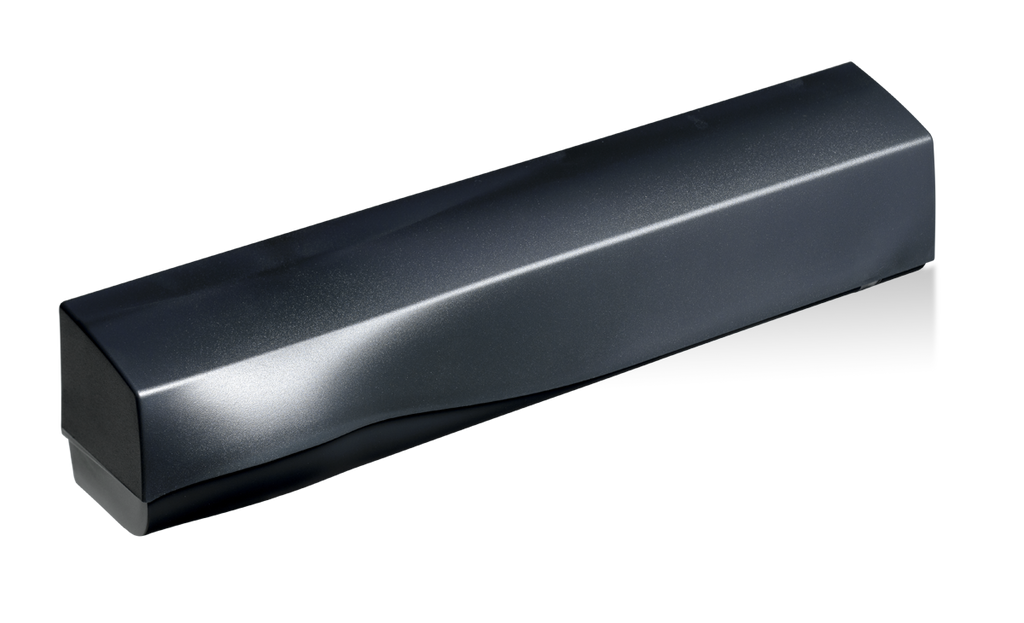
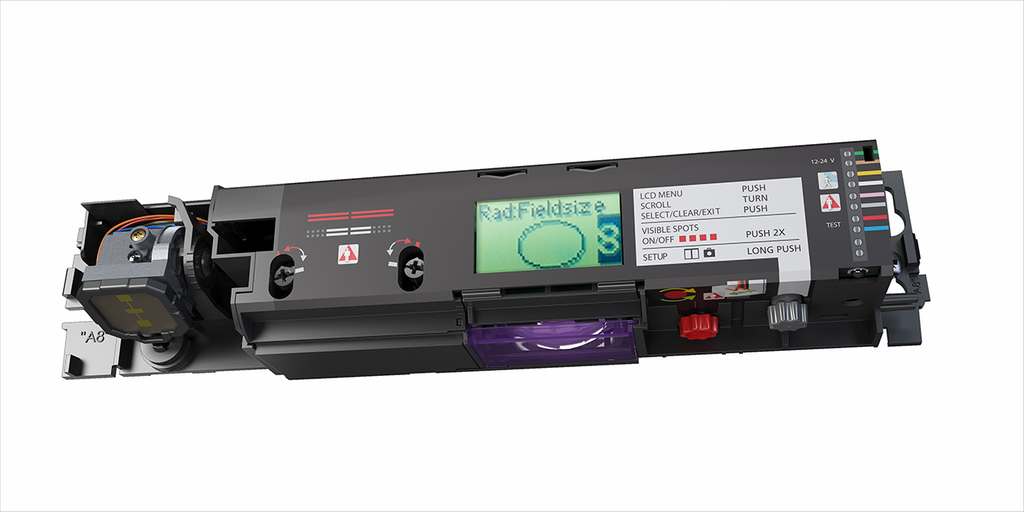
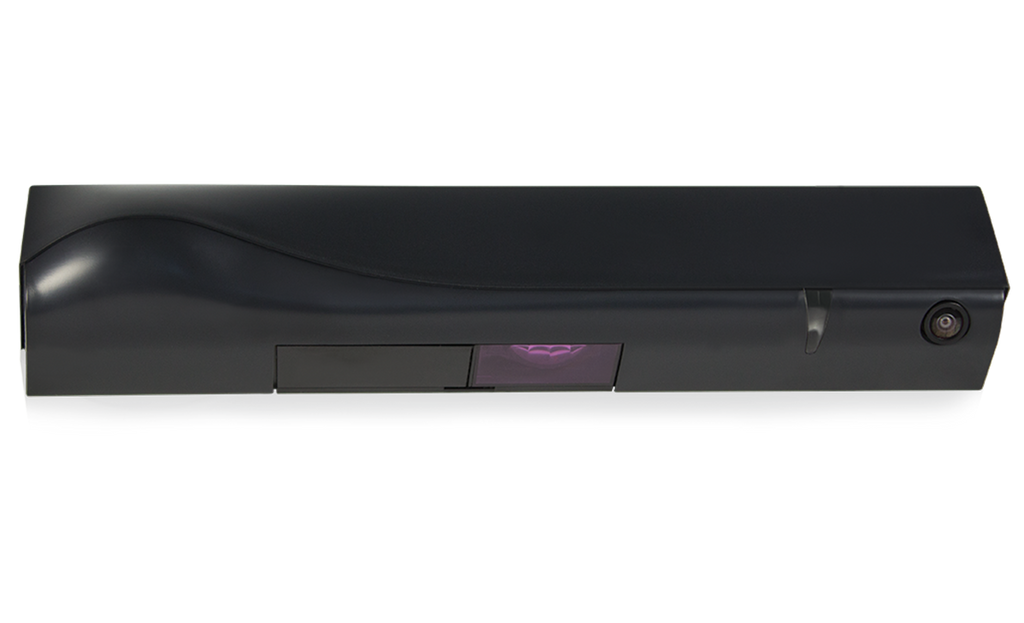
BEA’s IXIO-DT1 is a dual technology motion and presence sensor, combining microwave activation and infrared presence detection for the automatic sliding door industry.
This solution is highly flexible and user-friendly for sliding doors, industrial doors, vehicle gate detection and off-door automation.
The IXIO-DT1 can be adjusted into ANSI compliance and has earned a comprehensive list of credentials and certifications, including FCC and IP54.
The IXIO-DT1 ensures convenience, safety and energy efficiency for BEA customers and end users.
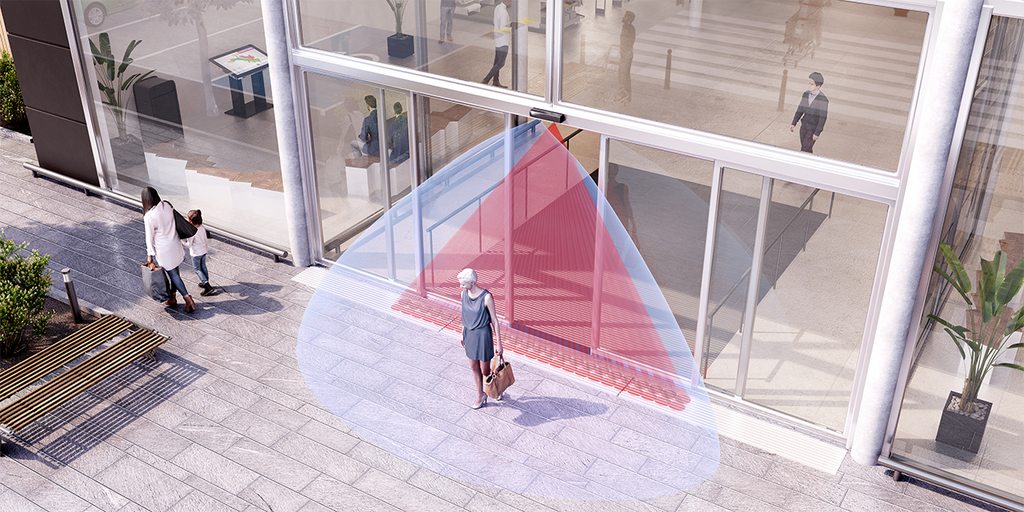
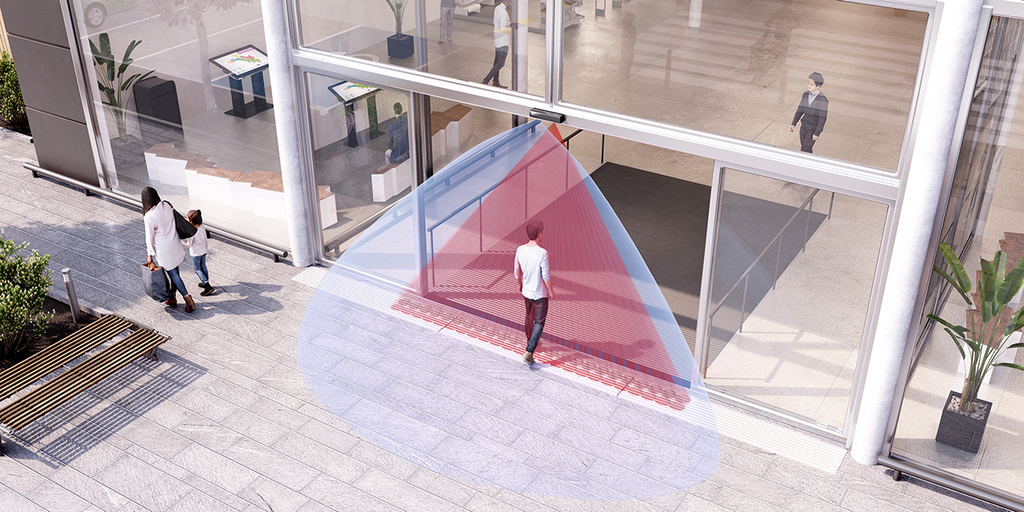
Ten microwave activation sensitivity settings and three infrared safety immunity settings
Two 24-spot, high-density, infrared safety curtains providing precise presence detection
Fully monitored internally, capable of external monitoring
Four visible red alignment spots are projected on the ground to assist in precise IR curtain adjustment
Technology |
Microwave Doppler Radar |
Active Infrared |
---|---|---|
Detection Mode |
Motion |
Presence |
Transmitter Frequency |
24.150 GHz |
N/A |
Transmitter Radiated Power |
< 20 dBm EIRP |
N/A |
Transmitter Power Density |
< 5 mW / cm2 |
N/A |
Spot Size |
N/A |
2” × 2” |
Max. Number of Spots |
N/A |
24 per curtain |
Max. Number of Curtains |
N/A |
2 |
Output |
Electro-mechanical-relay |
Solid-state-relay |
Test Input |
|
Sensitivity: |
Supply Voltage |
12 – 24 VAC ±10%; 12 – 30 VDC ±10% |
|
Power Consumption |
< 2.5 W |
|
Mounting Height |
6 ½ – 11 ½’ |
|
Temperature Range* |
-13 – 131 °F |
|
Degree of Protection |
IP54 |
|
Applicable Directives |
R&TTE 1999 / 5 / EC; LVD 2006 / 95 / EC; |
|
Dimensions |
10 3⁄5“ (W) × 2 ¼” (H) × 2 ¼” (D) |
|
Cable Length |
10’ |
|
Norm Conformity |
ISO 13849-1:2008 PL «c» CAT. 2 |
*LCD screen is operational from 14 – 131 °F. The sensor may still be programmed in colder temperatures, but with the remote control.
Activation and safety sensor for automatic sliding doors
Mounting Bracket
Curved door accessory bracket for IXIO family of sensors.
Deluxe Rain Cover
BEA offers replacement covers for the IXIO-DT1, IXIO-ST, IXIO-DT1 Industrial and IXIO-ST Industrial solutions.
Spacer for IXIO series of sensors.
Flush mount ceiling adapter
Universal industrial mounting bracket
BEA Universal Remote Control
Why will the IXIO’s active infrared safety pattern not hold the door open?
The brown and blue wires must be connected, or F1 must be set to “1” using the remote control.
Why is the PNP harness not working on a BESAM control?
The harness is reversed; the short harness plugs into the IXIO.
Why is the RECORD sliding door holding open?
The RECORD control uses a normally closed safety circuit; set the safety output to N.C.
Why is the IXIO bliking red on a DORMA door?
The IXIO is defaulted to monitoring ON; connect the two (2) purple monitoring wires to the control.
How do I eliminate four (4) orange LED flashes or “low AIR”?
Verify the pattern width shutters are not closed (the software should still be set to wide).
Verify the active infrared safety pattern is not tilted out too far away from the door.Turn off the 2nd active infrared safety pattern row.
Why does the door recycle open?
If the red LED illuminates, the active infrared safety curtain needs adjusted.
If the green LED illuminates, the microwave activation angle/sensitivity/immunity needs adjusted.
What are the extra wires not connected to the door control?
The two (2) purple wires are for monitoring and the yellow wire is for N.C. activation relay.
How do I locate the IXIO’s active infrared safety pattern relative to the door face?
Double-click the gray knob to turn on the visible red aligment spots or press UNLOCK > MAGIC WAND > + on the remote control, and then use the red knob to adjust active infrared saftey pattern to within 3” of the face of the sliding door panel. After adjustment, relaunch a setup.
How do I use an IXIO for 1-way traffic reactivation?
If the door is equipped with a two-way traffic option, connect the white and green wires to the activation circuit.
If the door is NOT equipped with a two-way traffic option, DO NOT connect the white and green wires to the activation circuit; instead, connect the brown and blue wires to the safety circuit.
Using the LCD, set RAD: REENTRY to value “”3″” or “”4″”. Walk-test to ensure there is a minimum of a 24” reactivation zone.
Why does the IXIO LED blink fast red when I try to unlock it with the remote control?
A lock code has been entered. To remove it, power cycle the IXIO and then press UNLOCK > LOCK > 0000.